The Top 7 Drone Filming Tips

Aerial videography used to be so simple that all it took to get a lot of positive feedback was to simply fly 200–300 meters in the air, bring the camera down, and take a video from a bird’s eye perspective. Now that the video business has expanded and raised its standards, a skyscraper-related clip is no longer unexpected. When drones with cameras entered the mainstream market, the issue was resolved.
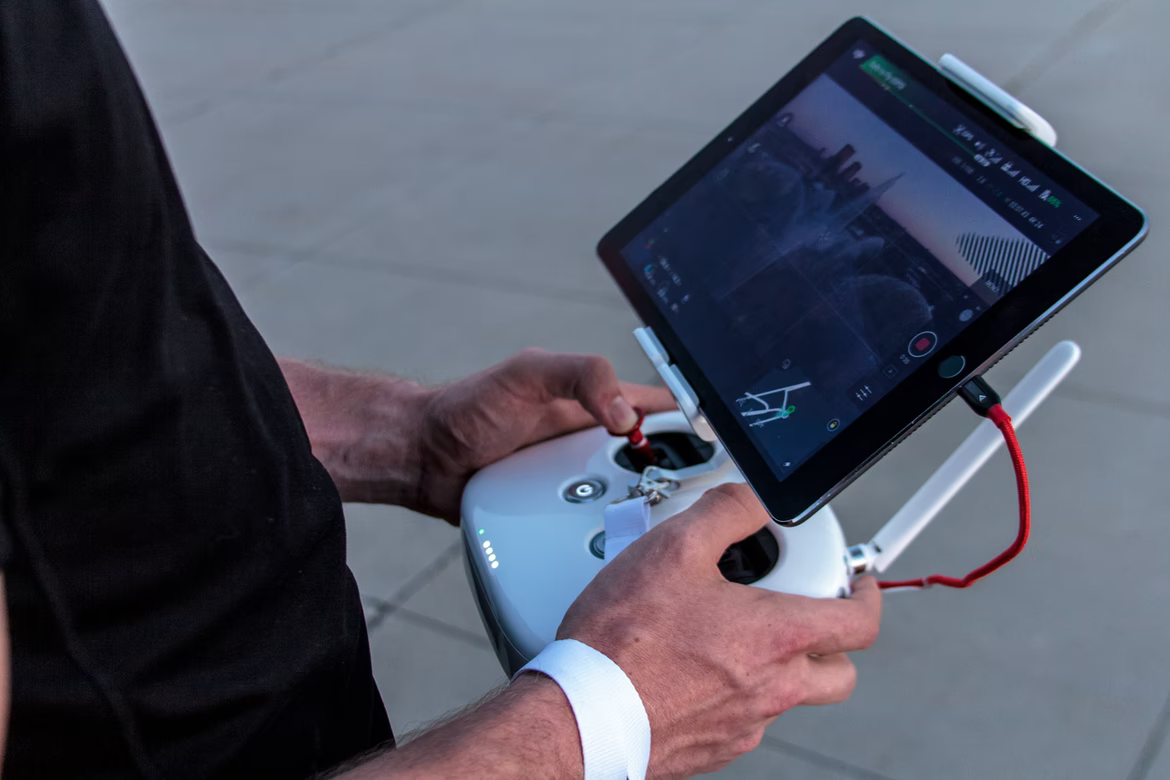
In order to be able to brag about a fantastic shooting, you must select the best drone, learn various flight tactics, cultivate creative thinking, and practice a lot. Of course, you need also be aware of various tactics to heighten the excitement.
So today we’re going to give you some advice on how to make your movies as cinematic as possible.
Drones for filmmaking
The use of drones for filmmaking is completely changing how movies and television shows are produced. Making a drone movie or a movie that includes some drone video is not all that different from making a typical movie. The three stages of production are the same for both processes:
- Pre-production: The stage of planning when the script and shot list are created, venues are scouted, permissions are obtained, and equipment is gathered.
- Production: The shooting phase.
- After production: the editing phase.
7 Effective Strategies for Quadcopter Shooting
1. Select the Appropriate Shooting Time
It’s critical to photograph at the proper time of day because the sensors in the majority of contemporary drones don’t yet have the same remarkable dynamic range as film cameras. This means that you must take pictures one hour after sunrise and an hour before sunset, known as the “golden hours.” You will have the best natural light and the most stunning image in this scenario.
2. Examine the Environment Before Takeoff
Determine the width of the area, then decide on an item or a scene for the video. Utilize AirMap to learn more about other regions. Consider how you can make use of the foreground. Find the exact location and time of the sun’s rise and set with the compass. You will then be able to comprehend how the light will fall. Some places only allow the rising or setting sun to fully appreciate their splendor.
3. Examine the weather before shooting
Never take the drone off from the ground; always launch it from the hand. Always use an anemometer to determine whether the wind speed is over 40 km/h. Flying upwind will ensure that, even in the worst-case scenario, the drone will continue to go in your way. Avoid flying at all during a downpour, not so much to protect the engines as to protect the camera lens from being wet, which would render the entire video absolutely useless.
Additionally, be sure to plan ahead when shooting in the cold. Keep in mind that flying in the winter will cause the drone’s battery to discharge substantially more quickly than it would in the summer. Therefore, be ready for brief flight times—an average of 15 minutes. The temperature range for each particular drone gadget is listed in the drone datasheet. Additionally, always preheat the batteries before taking off.
4. Ensure Nd Filters Are Used
These essentially function as camera sunglasses since they reduce the amount of light that gets into your lens. Therefore, regardless of the frame rate you employ, ND filters let you keep the shutter speed within the necessary range. As a result, your video will have the most realistic motion blur effect possible, giving it a far more dramatic feel. Additionally, it will aid in preventing the little camera shake that results from the drone’s vibration when the shutter speed is set too quickly.
5. Consider The Situation Ahead of Time
Consider your filming options before the flight, not after. Some drone operators choose to activate the video mode from liftoff until landing. However, if you don’t have a clear idea or shooting scenario, you’ll end up with a ton of extra footage that will be challenging to edit. Never attempt to use every bit of your film; originality is found in choosing the best ones.
On the other hand, you can come across a scenario where no shots are viable. For instance, let’s say you flew around a stunning lighthouse, but the wind suddenly changed during the flight or you made a control mistake, the drone’s camera twitched, the smoothness of the filming was lost, and the footage now looks bad. Don’t rush to discard the footage; instead, attempt to edit it with the use of a video editor or a free video stabilizer.
Simple video editing is easily possible in DJI drones of the Mavic Mini series’ native software. Decrease the replay speed if the camera jolted while in flight. Therefore, any jerk will vanish.
And don’t forget to include music in the video. Every rotation of the drone should, ideally, preserve the melody’s beat. This will contribute to adding to the mood. A drone might cross a mountain crest and then fly over a sizable valley, lake, or body of water. Try to time your move to the music’s tempo change or pause. This will add more emotional dimension to the plot.
6. Keep all motions gentle and slow
Your footage will also take on a more cinematic appearance. The most frequent error made by inexperienced pilots is flying too quickly. Avoid doing that. There are circumstances where flying quickly is necessary, but you must first understand why you are doing it and then fly much more cautiously to avoid hitting any obstacles or people.
7. Play around with angles
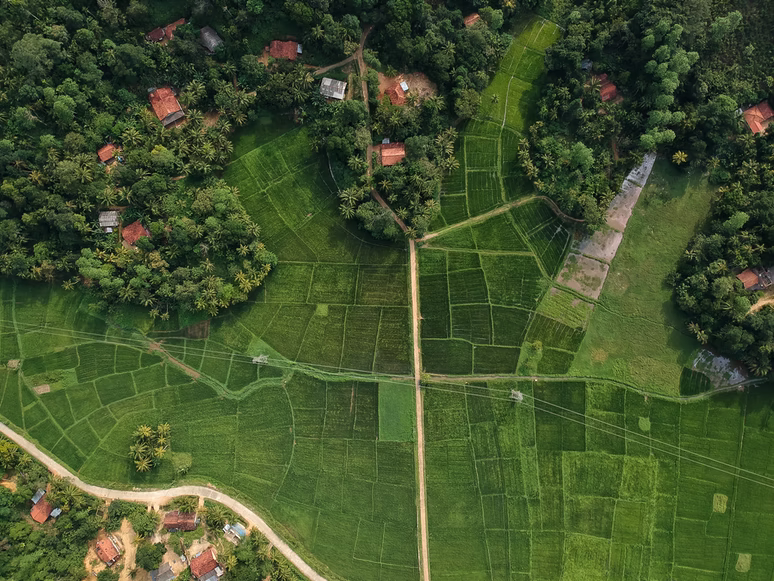
- Change the viewpoint. Using a drone, you may take pictures from above at angles that a camera simply cannot match. As you’ll capture the landscape exactly as it is, shooting straight down can produce excellent footage. Relief and forms that you aren’t even aware of are visible.
- Observe symmetry. Such beauty that cannot be seen from the ground can be viewed from a bird’s eye perspective. Unbelievably symmetrical shapes can be hidden in a park or city square.
- Look for hues that stand out. People adore bright things because their deep hues go so well together. A frame with more contrast will be more expressive; experiment with highlights and shadows, and look for areas with a variety of colors and textures, such as water and sand, vegetation and asphalt, and so on.
- Check items for repetition. Precise lines can be produced by carefully built pieces as if from a template. Large numbers of the same items can be found in locations like warehouses or train stations, and even common neighbors’ properties might be arranged in amusing rows. A photo with real interest.
- Observe shadows. The secret to igniting the imagination may lie in the shadows. Just before sunset, when the sun sets, shadows become enormous outlines that tell some fascinating tales about landscape photography.
To find a shooting location and obtain an idea of the type of videos you want to produce, try using Google Earth. Examine other filmmakers’ footage shot in the same area. Before you launch the drone into the air, this will aid in your ability to picture the situation.
Wrap up
Drone videography became popular a few years ago. Additionally, while using this device to record video is more challenging than using a conventional camera, the results are also more captivating.
As soon as you purchase your first drone, make sure to carefully research it. Learn how to operate it, start it, and turn on the emergency shutdown feature. Don’t rush to send the drone into the clouds as soon as it is launched. Lift the drone 5–10 meters into the air to prevent it from vanishing from your line of sight. Examine the device’s stability in the air and play with the control buttons. Learn primarily through scientific trial and error.
But understanding how to operate a drone is insufficient. Learn how to use any video editing program to make videos that are truly immersive. Without proper editing, you can’t do anything right now. So, if you’re too lazy to learn programs on your own, outsource the video editing.
Don’t forget to follow our recommendations as well, so that shooting becomes not just a fun activity but also your calling.
Play Quordle in your free time to relax and have fun with friends.